Ever wanted to bring a charming, expressive owl to life, not just on paper, but with the boundless possibilities of a digital canvas? Diving into Digital Tools & Techniques for Cartoon Owl Art opens up a world where mistakes are undoable, colors are infinite, and creativity knows no bounds. This guide will walk you through everything you need to know, from choosing your foundational software and hardware to navigating a professional-grade workflow that turns your owl-inspired visions into vibrant digital realities.
Whether you're a budding artist or an experienced illustrator looking to refine your digital process, you'll find practical advice to make your cartoon owls take flight. We're talking about more than just drawing; we're talking about mastering a digital language to express the unique personalities of these wise, whimsical creatures.
At a Glance: Key Takeaways for Digital Owl Artists
- Software Choices Matter: Raster programs (Procreate, Photoshop, Clip Studio Paint) excel at painterly textures, while vector software (Illustrator, Affinity Designer) offers crisp, scalable lines. Your style often dictates the best fit.
- Hardware is Your Brush: A good graphics tablet (pen display or pen tablet) is essential for natural drawing control and pressure sensitivity.
- Workflow is Key: A structured approach—from concept and sketching to inking, coloring, and final touches—streamlines your creative process.
- Layer Management: Use layers diligently for non-destructive editing, making revisions a breeze.
- Embrace Experimentation: Digital art allows for endless exploration of brushes, colors, and effects without waste.
- References are Gold: Even for cartoons, studying real owls and other cartoon styles provides invaluable insight.
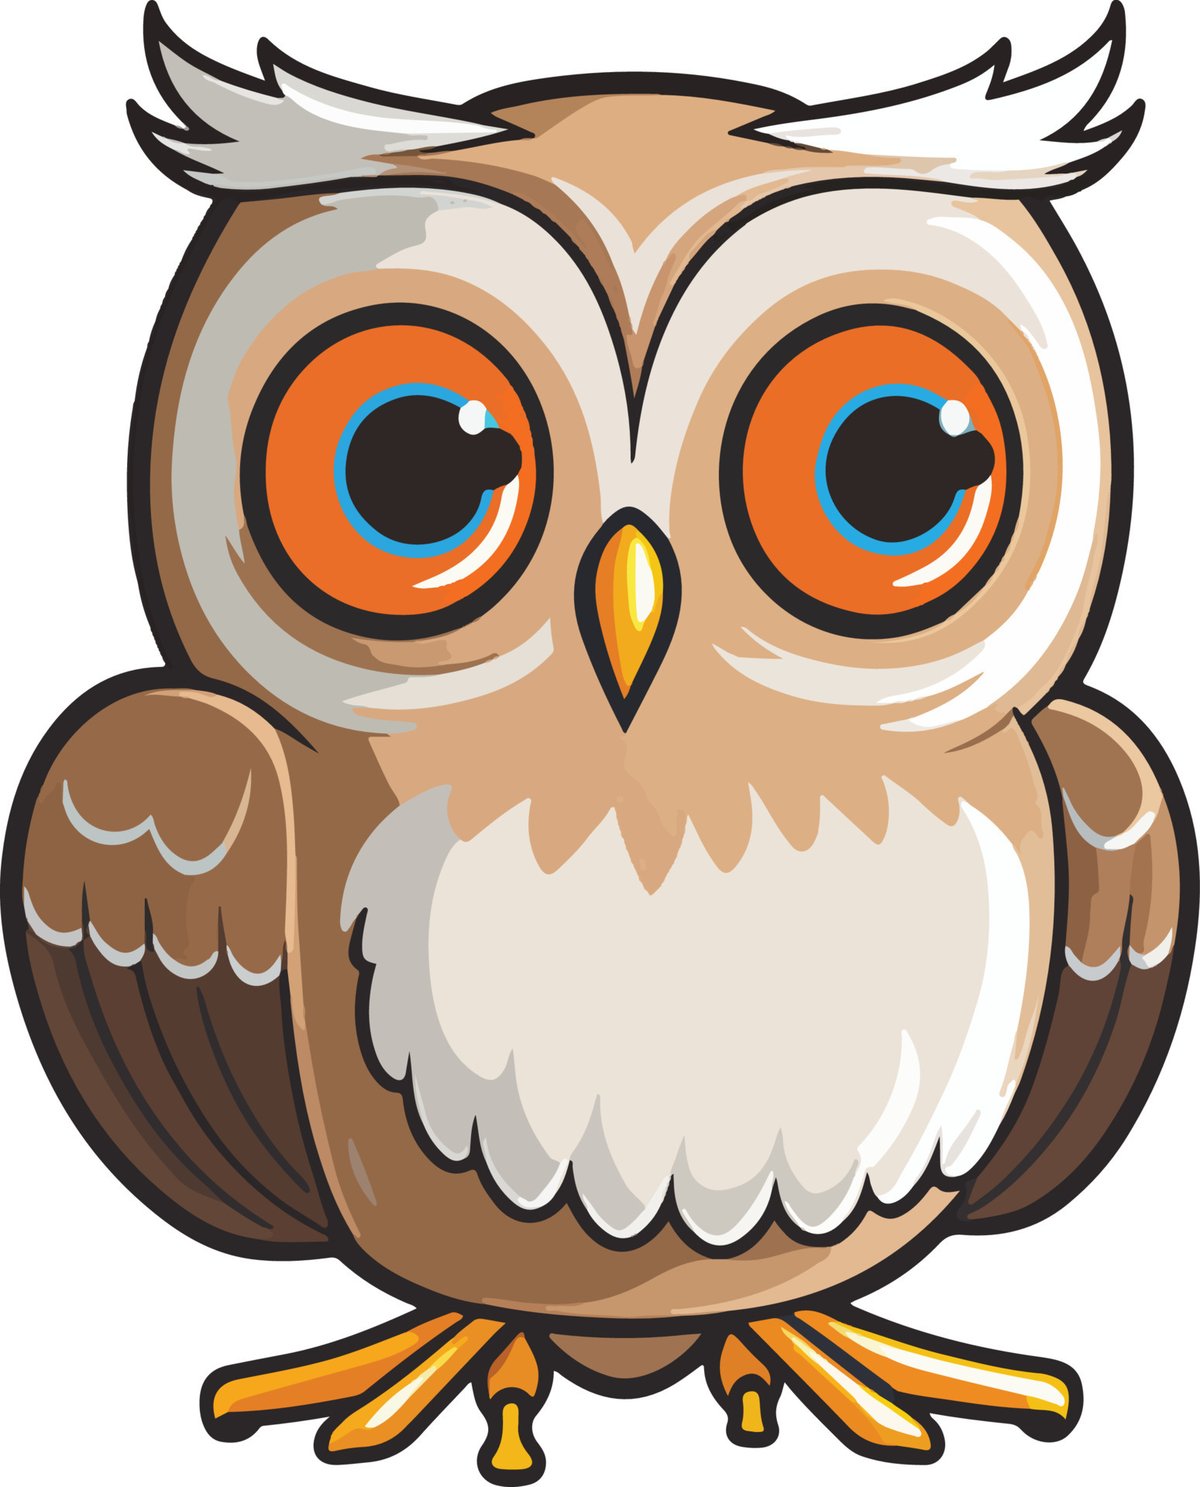
Why Cartoon Owls? Why Digital? Unlocking Creative Potential
There's a universal appeal to owls, isn't there? Their large, expressive eyes, distinctive silhouettes, and often perceived wisdom make them fantastic subjects for cartooning. They're versatile – capable of being goofy, stern, adorable, or majestic, all within the cartoon medium. When you choose to render these captivating characters digitally, you gain an immense advantage.
Digital art offers unparalleled flexibility. You can experiment with countless brush types, limitless color palettes, and intricate textures without ever running out of supplies or making an irreversible mistake. The "undo" button is your best friend, empowering you to take risks and iterate rapidly. Furthermore, digital artwork is inherently ready for various platforms, from social media to print, making it incredibly practical for sharing and monetizing your creations. It truly democratizes the art-making process, putting powerful tools into the hands of anyone with a passion for pixels.
Your Essential Digital Toolkit: Choosing Your Weapons Wisely
Before you even think about sketching, you need to arm yourself with the right digital weapons. This isn't just about owning software; it's about understanding how each tool empowers your specific artistic goals.
Software Choices: Raster vs. Vector – A Fundamental Decision
The first major fork in the road is deciding between raster and vector software. Each has its strengths and weaknesses, influencing the look and feel of your final cartoon owl.
Raster-Based Software: For Painterly Charm and Detailed Textures
Raster programs work with pixels. Think of it like painting on a canvas with tiny dots of color. This makes them excellent for organic textures, soft shading, and traditional media simulations.
- Adobe Photoshop: The industry standard for digital painting and image manipulation. It offers an incredible range of brushes, powerful layering capabilities, and robust blending options. While it has a subscription model, its versatility is unmatched for professional use.
- Procreate (iPad only): Hugely popular among artists for its intuitive interface, excellent brush engine, and portability. It's incredibly powerful for its one-time purchase price and makes drawing anywhere a joy. If you have an iPad, this is a top contender for cartooning.
- Clip Studio Paint (CSP): Widely lauded by comic and manga artists, CSP boasts superb line-art tools, perspective rulers, and animation features. Its brush engine is fantastic for creating crisp lines and simulating traditional media.
- Krita (Free & Open Source): A fantastic, full-featured painting program, Krita offers a wealth of brushes, powerful layer management, and a robust feature set, making it an excellent choice for budget-conscious artists.
- GIMP (Free & Open Source): Often compared to Photoshop, GIMP is a powerful image editor. While its interface can be less intuitive for drawing, it's a capable tool for painting and manipulation.
Best for: Artists who prefer a hand-drawn, textured, or painterly look; complex shading; and detailed character work where pixel-perfect precision is less critical than organic feel.
Vector-Based Software: For Crisp Lines and Scalable Perfection
Vector programs work with mathematical paths and points, not pixels. This means your artwork can be scaled to any size—from a tiny icon to a giant billboard—without ever losing quality or becoming pixelated.
- Adobe Illustrator: The industry gold standard for vector graphics. Illustrator provides precise control over lines, shapes, and colors, making it ideal for logos, branding, and illustrations that need to be highly scalable.
- Affinity Designer: A powerful, more affordable alternative to Illustrator, offering both vector and raster capabilities within a single application. It's known for its fluid workflow and competitive feature set.
- Inkscape (Free & Open Source): A very capable vector editor that's an excellent choice for those starting out or on a budget. While it might have a steeper learning curve than paid options, it can produce professional results.
Best for: Artists who prioritize clean, sharp lines; flat color styles; designs that need to be infinitely scalable (e.g., merchandise, branding); and intricate geometric shapes.
Making the Choice: For cartoon owl art, many artists blend these approaches. You might sketch in a raster program, then ink with vector tools for crispness, and finally color and shade back in raster. Or, you might stick purely to raster for a fully painted look. Consider your preferred style: do you want soft, painterly owls, or sharp, iconic ones?
Hardware Essentials: Your Digital Canvas and Pen
Good software is only half the battle. You need reliable hardware that translates your physical movements into digital strokes naturally.
- Graphics Tablets: This is your primary input device. It replaces the mouse for drawing and painting, offering pressure sensitivity that allows you to vary line thickness and opacity based on how hard you press.
- Pen Tablets (e.g., Wacom Intuos, Huion Inspiroy): You draw on a flat surface while looking at your computer monitor. There's a slight disconnect initially, but it becomes second nature. They are generally more affordable and excellent for ergonomics once mastered.
- Pen Displays (e.g., Wacom Cintiq, Huion Kamvas, XP-Pen Artist): These tablets have screens you draw directly on, mimicking the feel of traditional drawing. They offer a highly intuitive experience but come at a higher price point.
- Stand-alone Tablets (e.g., iPad Pro with Apple Pencil, Samsung Galaxy Tab with S Pen): These are self-contained computers with built-in screens, offering the ultimate portability and a direct drawing experience. They're often powered by mobile operating systems but run professional-grade art apps like Procreate or Clip Studio Paint.
Recommendation: For most beginners, a medium-sized pen tablet (like a Wacom Intuos M) is an excellent starting point. If your budget allows, a pen display significantly enhances the drawing experience. An iPad Pro with Apple Pencil is arguably the most popular choice for digital cartoonists due to its balance of power, portability, and excellent app ecosystem. - Computer/Device: You'll need a machine capable of running your chosen software smoothly.
- Desktop PC or Mac: Offers the most power and upgradeability, ideal for demanding software like Photoshop or Illustrator with large files.
- Laptop PC or Mac: Provides good power and portability, perfect for working from different locations.
- iPad Pro/Air or Samsung Galaxy Tab: Excellent for artists who prioritize portability and a direct drawing experience, especially when paired with apps like Procreate or Clip Studio Paint.
Key takeaway: Don't skimp on a good graphics tablet. It's the most impactful hardware investment for your digital art journey.
The Digital Cartoon Owl Workflow: A Step-by-Step Guide
Creating a compelling cartoon owl isn't just about having the right tools; it's about employing a systematic workflow. This structured approach helps you break down a complex task into manageable steps, ensuring consistency and quality from start to finish.
Phase 1: Concept & Sketching – The Blueprint of Brilliance
Every great piece of art starts with an idea. This phase is about exploring that idea and laying down the foundational structure.
Finding Your Owl Inspiration
Before you even put pen to tablet, gather your muse. Look at real owls – their different species, feather patterns, eye colors, and postures. Then, dive into existing cartoon styles. How do other artists simplify features? What expressions do they capture? Pinterest, with its vast collection of "owl digital art ideas," is a fantastic starting point for visual brainstorming. You can also explore professional portfolios on sites like Behance for "owl illustration digital art" to see diverse interpretations and learn from experienced artists. Don't copy, but observe and absorb.
Rough Sketching: Unleashing the Basic Shapes
Open your preferred raster software (Procreate, Photoshop, Krita) and create a new canvas. Start with broad, loose strokes using a simple, pressure-sensitive pencil or sketch brush. Think in basic shapes: a large oval for the body, smaller circles for the head and eyes, simple triangles for ears or tufts.
- Tip: Use a light color (e.g., light blue or grey) for these initial sketches on a new layer. This helps distinguish it from your cleaner line art later.
- Focus on: Proportion, pose, and overall silhouette. Don't worry about details yet. Is your owl whimsical, wise, or grumpy? These early shapes should hint at its personality.
Refining the Sketch: Adding Definition
On a new layer above your rough sketch, begin to refine your lines. Reduce the opacity of the rough sketch layer to about 20-30% so it acts as a guide. Now, use slightly firmer, more deliberate strokes.
- Define Features: Give clearer shape to the eyes, beak, wings, and feet. Consider how the feathers will lay.
- Think Volume: Even in a cartoon, objects have volume. Use slightly curved lines to suggest the roundness of the owl's head or the curve of its belly.
- Establish Pose: Ensure the pose feels dynamic and balanced. Are its wings outstretched, or is it perched?
Phase 2: Inking – Bringing the Lines to Life
The inking phase is where your sketch transforms into crisp, definitive line art. This is crucial for giving your cartoon owl a professional and polished look.
Choosing the Right Brush for Your Style
The "ink" brush you choose will heavily influence the final look.
- Hard Round Brush: For clean, consistent lines, often used in vector art or crisp, comic-book styles.
- Textured Ink Brush: For a more traditional, slightly scratchy, or hand-drawn feel.
- Tapered Brush: Allows for varied line weight, naturally thinning at the ends for a dynamic look.
Experiment with different brushes until you find one that feels right for your desired aesthetic. Many artists create custom brushes or download brush packs designed for inking.
Clean Line Art: Precision and Flow
Create a new layer above your refined sketch layer. This will be your dedicated line art layer. Use your chosen ink brush to trace over your refined sketch.
- Smooth Strokes: Try to draw long, confident strokes rather than many short, choppy ones. If you're struggling, practice drawing curves and straight lines repeatedly until they feel natural.
- Line Weight: Varying line weight adds depth and interest. Thicken lines on the outside contours of your owl (where light wouldn't hit as much) and use thinner lines for internal details. This makes the character "pop."
- Vector vs. Raster for Lines: If you're working in a vector program like Illustrator or Affinity Designer, your lines will be infinitely scalable and editable. In raster programs, pay attention to resolution to keep lines sharp.
Tips for Smooth Lines
- Stabilizer Settings: Most digital art software has a "stabilizer" or "smoothing" setting for brushes. Increase this to a comfortable level to help correct slight hand tremors and produce smoother curves.
- Zoom In: Don't be afraid to zoom in closely to refine small details and ensure lines connect perfectly.
- Flip Canvas: Regularly flip your canvas horizontally. This helps you spot asymmetry and awkward lines that you might miss when constantly looking at the same orientation.
Phase 3: Color & Shading – Adding Personality and Depth
Color is where your cartoon owl truly comes alive, conveying mood, personality, and form.
Color Palette Selection: Setting the Mood
Consider the personality of your owl. Is it a cheerful, bright-eyed creature, or a wise, nocturnal guardian?
- Warm vs. Cool: Warm colors (reds, oranges, yellows) can evoke energy and friendliness. Cool colors (blues, greens, purples) can suggest calm, mystery, or wisdom.
- Limited Palette: Sometimes, working with a limited color palette can create a more cohesive and impactful design.
- Reference Nature: Even for a cartoon, natural owl colors (browns, grays, whites, hints of orange/yellow in the eyes) can be a great starting point, which you can then exaggerate.
Flat Colors: Laying the Foundation
On new layers below your line art, start filling in the base colors for each major section of your owl (body, eyes, beak, feet, specific feather patterns).
- Color Blocking: Use the "fill" tool or a large, opaque brush to lay down flat colors.
- Separate Layers: Keep different color areas on separate layers (e.g., "Body Color," "Eye Color," "Beak Color"). This is crucial for non-destructive editing and makes shading much easier.
- Color Picker: Use the eyedropper tool to quickly select colors from your palette.
Shading & Highlights: Defining Form and Texture
This is where your owl gains dimension. Create new layers above your flat color layers but below your line art.
- Light Source: First, decide on a consistent light source. Is it coming from the top-left, bottom-right, or directly in front? This dictates where shadows and highlights will fall.
- Shadows: Use a slightly darker, desaturated, or color-shifted version of your base color for shadows.
- Layer Blend Mode: Often, setting the shadow layer to "Multiply" blend mode and reducing its opacity works wonderfully for natural-looking shadows.
- Highlights: For highlights, use a lighter, slightly more saturated version of your base color.
- Layer Blend Mode: "Screen" or "Overlay" blend modes can work well for highlights, often with reduced opacity.
- Form & Texture: Use shading to indicate the roundness of the owl's body, the texture of its feathers, and the depth of its eyes. Think about subtle gradients for smoother surfaces and harsher shadows for sharp edges.
- Eye Shine: A tiny, bright highlight in the eye (on its own layer) can instantly bring your owl to life.
Choosing Blend Modes: Unlocking Digital Magic
Blend modes change how layers interact with each other. Experiment with:
- Multiply: Great for shadows, darkening the underlying layers.
- Screen: Excellent for highlights, brightening the underlying layers.
- Overlay/Soft Light: Good for adding subtle color shifts, richness, or textures that interact with both light and shadow.
- Color Dodge/Add: Can create strong, glowing effects.
Phase 4: Textures & Special Effects – The Extra Sparkle
Now that your owl has form and color, it's time to add those finishing touches that make it truly unique and engaging.
Adding Feathery Textures
While cartoon owls are simplified, a hint of feather texture can add charm without becoming overly realistic.
- Subtle Brushwork: Use a slightly textured brush (maybe a "noisy" or "bristle" brush) on a new layer, with a low opacity, to add gentle feather patterns.
- Blend Modes: Experiment with "Overlay" or "Soft Light" for these texture layers to make them blend naturally with the base colors.
- Direction: Follow the natural direction of feathers on an owl's body to make the texture feel organic.
Backgrounds & Environments
An owl rarely exists in a vacuum. A simple background can enhance its story.
- Color Gradients: A simple gradient from a light sky color to a darker ground color can work wonders.
- Blurred Elements: If your owl is the main focus, use blurred background elements (trees, moon, stars) to suggest a setting without distracting.
- Simple Shapes: Abstract shapes or a single contrasting color can make the owl stand out.
Lighting Effects: Enhancing Mood
Digital tools make light effects easy to implement.
- Glows: If your owl has glowing eyes or is holding a magical item, use bright colors on "Color Dodge" or "Add" blend mode layers around the light source.
- Ambient Light: A subtle, soft glow around the owl can separate it from the background.
- Rim Lighting: A thin, bright line along one edge of the owl can simulate strong backlighting, adding drama.
Small Details: The Devil's in the Details
These are the tiny elements that often make a cartoon character memorable.
- Unique Patterns: Does your owl have a specific pattern on its belly or wings?
- Accessorize: A tiny bow tie, a wizard hat, or a pair of spectacles can give your owl character.
- Pupil Shape: While many cartoon owls have round pupils, experimenting with slits or other shapes can add personality.
- For more inspiration and a wide variety of styles, you might want to Explore our owl cartoon collection to see how others have approached unique details.
Phase 5: Final Touches & Export – Polishing Your Masterpiece
You're almost there! This phase is about refining your artwork and preparing it for the world.
Adjustments: Bringing Everything into Harmony
- Color Correction: Use adjustment layers (e.g., Curves, Levels, Color Balance) to fine-tune the overall color harmony, contrast, and brightness of your artwork. These are non-destructive and can be easily toggled off or adjusted.
- Saturation: Sometimes, a slight boost or reduction in saturation can make your colors pop or feel more cohesive.
- Sharpening: A subtle sharpening filter can bring out details, but use it sparingly to avoid artifacts.
- Noise/Grain: A very light layer of digital noise or grain can sometimes make a perfectly clean digital piece feel a bit more organic.
Signature/Branding
Don't forget to sign your work! Place your signature or a small watermark subtly on the piece. This is your artistic claim.
Exporting for Web/Print: Ready for the World
The final step is to save your artwork in the correct format and resolution for its intended use.
- Web Use (Social Media, Websites):
- Format: JPEG (for general images, good compression) or PNG (for images with transparency or sharper lines, larger file size).
- Resolution: 72 DPI (dots per inch) is standard for web.
- Dimensions: Usually between 1000px and 2000px on the longest side, depending on the platform.
- Color Profile: sRGB is standard for web.
- Print Use (Posters, Merchandise):
- Format: TIFF (lossless, high quality) or high-quality JPEG/PNG. Some printers accept PDF.
- Resolution: 300 DPI is standard for high-quality print.
- Dimensions: Ensure the canvas size matches your intended print size (e.g., 8x10 inches at 300 DPI).
- Color Profile: CMYK is typically used for print, though many modern printers can handle sRGB. Check with your print service provider.
Always save your original working file (e.g., PSD, AI, .clip, .procreate) with all layers intact! This allows you to go back and make changes later.
Troubleshooting Common Digital Owl Art Hurdles
Even with the best tools and techniques, you'll encounter challenges. Here are solutions to common issues:
- "My Lines are Wobbly!"
- Solution: Increase your brush stabilizer/smoother settings. Practice drawing long, confident strokes without lifting your pen. Zoom in to tackle tricky curves, and remember to flip your canvas frequently. Sometimes, it's just a matter of more practice with your tablet.
- "Colors Look Flat!"
- Solution: Revisit your light source. Are your shadows and highlights distinct enough? Experiment with "Multiply" for shadows and "Screen" for highlights at varying opacities. Add subtle color shifts within your shadows and highlights instead of just using darker/lighter versions of the base color. A touch of ambient light or a background can also add depth.
- "How Do I Make It Look 'Cartoon-y'?"
- Solution: Exaggeration is key in cartoons. Large eyes, simplified shapes, and expressive poses instantly signal "cartoon." Focus on clear, strong silhouettes. Limit complex textures and realistic details. Use bold, clear lines and vibrant colors. Study other cartoonists you admire.
- "Choosing Between Raster and Vector is Hard!"
- Solution: If you love painterly textures, intricate shading, and a hand-drawn feel, go raster (Procreate, Photoshop). If you need ultra-crisp lines, infinitely scalable artwork (for logos, t-shirts), and clean, flat colors, go vector (Illustrator, Affinity Designer). Many artists use a hybrid approach, sketching in raster and then vectorizing their lines. Pick the one that feels most natural for your current art goal.
Expert Tips for Elevating Your Owl Art
Beyond the technical steps, these insights can truly make your cartoon owls soar.
- Reference, Reference, Reference: Even for a stylized cartoon, understanding real owl anatomy, feather patterns, and poses is invaluable. It helps you exaggerate effectively and create believable yet whimsical characters. Don't limit yourself to real owls; look at successful cartoon characters in general to understand principles of appeal and expression.
- Experiment with Styles: The digital medium encourages experimentation. Try different brush packs, explore various coloring techniques (cel shading, soft shading, painterly), or even dabble in animation. Don't be afraid to step outside your comfort zone. You might discover a new signature style for your owls.
- Join Online Communities: Platforms like Instagram, DeviantArt, ArtStation, and even Reddit have thriving art communities. Share your work, get feedback, and connect with other artists. Seeing how others approach cartoon owl art can be incredibly motivating and educational.
- Practice Consistently: Like any skill, digital art improves with consistent practice. Set aside dedicated time each day or week to draw, even if it's just a quick sketch. The more you use your tools, the more intuitive they become, and the faster your creative process will flow. Don't aim for perfection in every piece; aim for learning and growth.
Your Next Flight Path in Digital Art
You've now got a robust understanding of the digital tools, techniques, and workflow necessary to create captivating cartoon owl art. From selecting your software and hardware to navigating the intricacies of sketching, inking, coloring, and final polishing, you're equipped to embark on a truly rewarding creative journey.
The beauty of digital art is its forgiving nature and endless possibilities. Don't be afraid to experiment, make mistakes, and discover your own unique style. Each owl you draw, each color palette you explore, each texture you apply will bring you closer to mastering this craft. Pick up your digital pen, open your canvas, and let your imagination take flight. The world is ready for your charming, wise, and wonderfully unique cartoon owls.